How to mount storage in Azure Containers
Guide to Setting Up a File Share for Your Azure Container App
In this tutorial, we will guide you through the process of setting up an Azure file share and binding it to a container environment. This setup is essential for providing persistent storage that your container app can access.
Here is a link to the docker files if you wanted to see the Dockerfile or .py script.
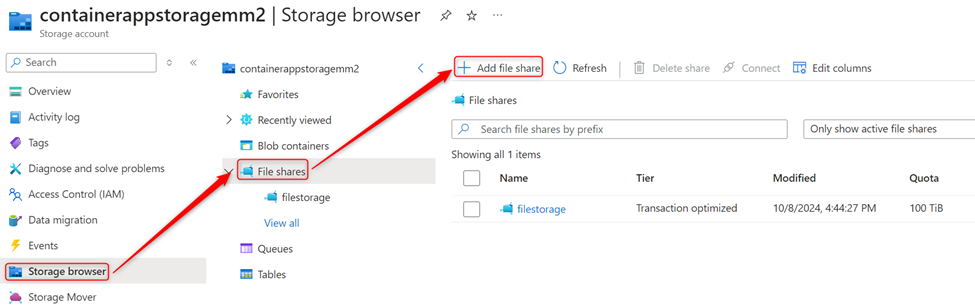
Step 1: Create a File Share in Azure Storage
- Open the Storage Account
- Navigate to your Azure storage account.
- Go to Storage Browser > File Shares.
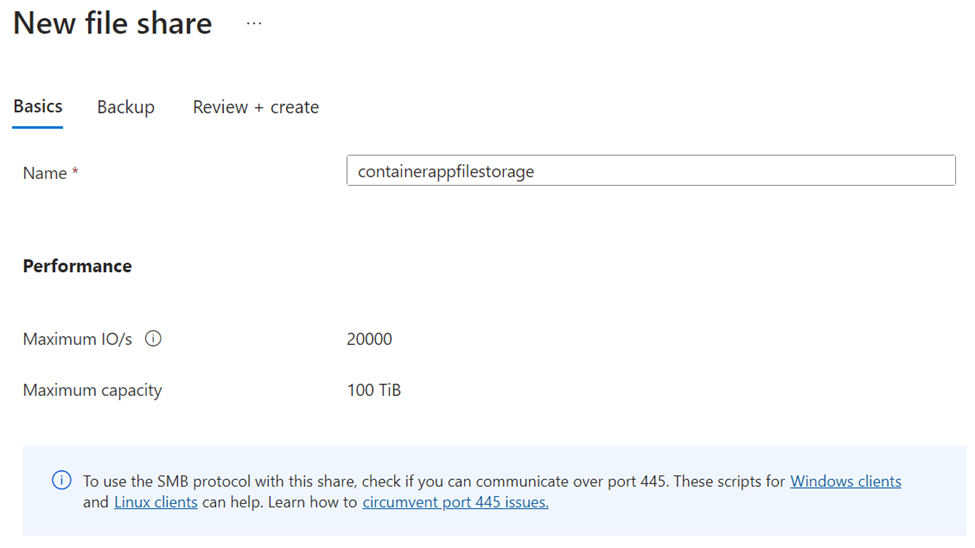
- Add a File Share
- Click Add File Share.
- Name your file share anything you’d like. We will reference this name later in the container environment.
- For this guide, we will use the name
'containerappfilestorage'.
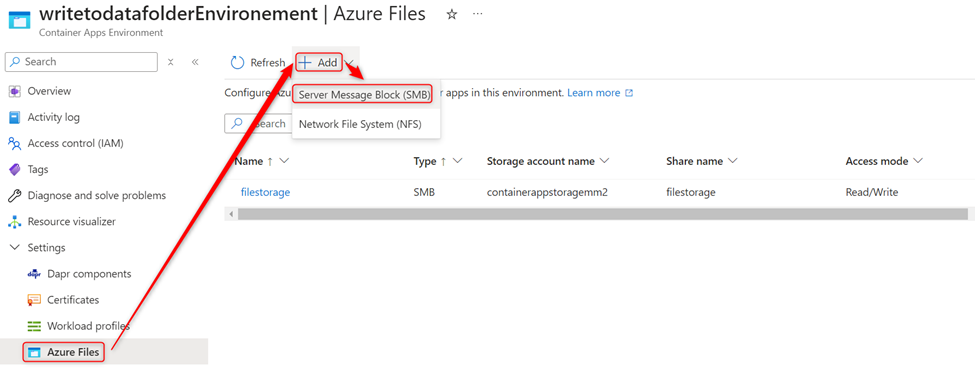
Step 2: Bind the File Share to the Container Environment
- Open the Container App Environment
- In the Azure portal, navigate to your Container App Environment.
- Go to Azure Files > Add > SMB File Share.
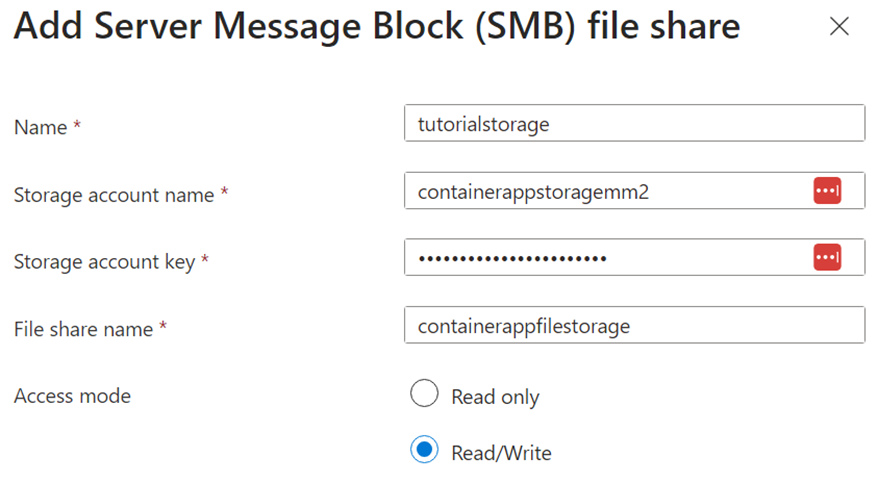
- Fill in the Required Information:
- Name: You can give it any name you want.
- Storage Account Name: Enter the name of your storage account.
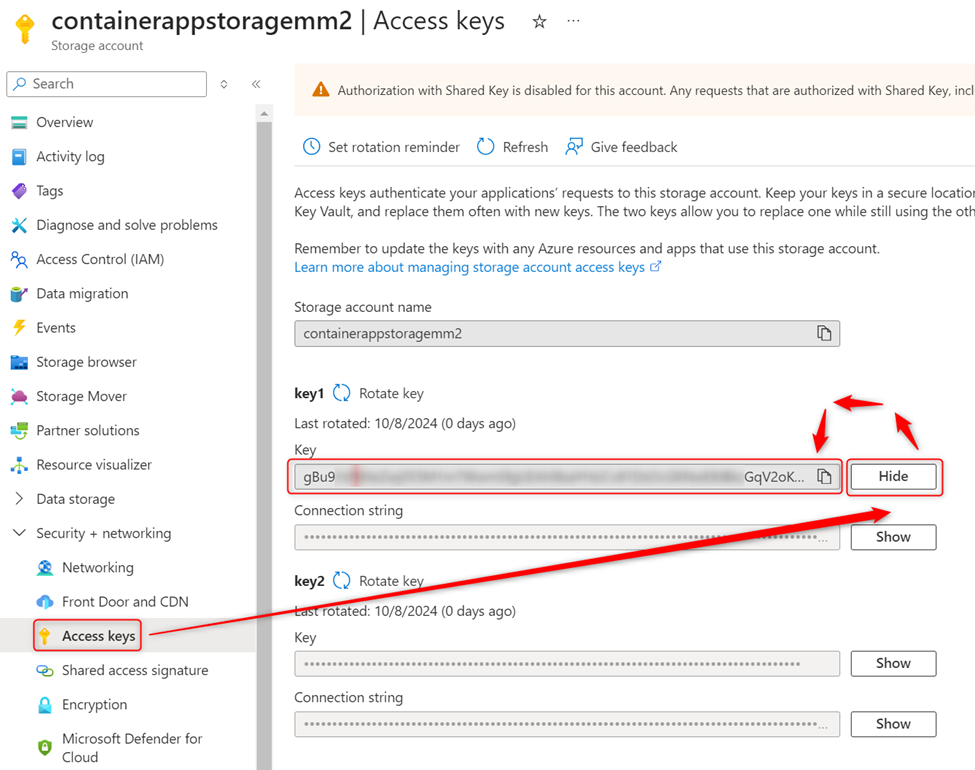
- Storage Account Key: This can be found in your storage account under Access Keys. Make sure to copy the Key and not the connection string.
- File Share Name: Enter the name of the file share you created earlier (in our case,
containerappfilestorage). - Access Mode: For this tutorial, set the access mode to Read/Write. Note that for some applications, Read-only access is recommended to ensure stability, especially if the app crashes or is interrupted during file writing, which can lead to file corruption.
- Add the File Share
- Once all the information is entered, click Add to bind the file share to the environment.
- Don’t forget to save the file share to the environment!
Step 3: Attach the File Share to Your Container App
- Open Your Container App
- Navigate to the container app you want to bind the file share to.
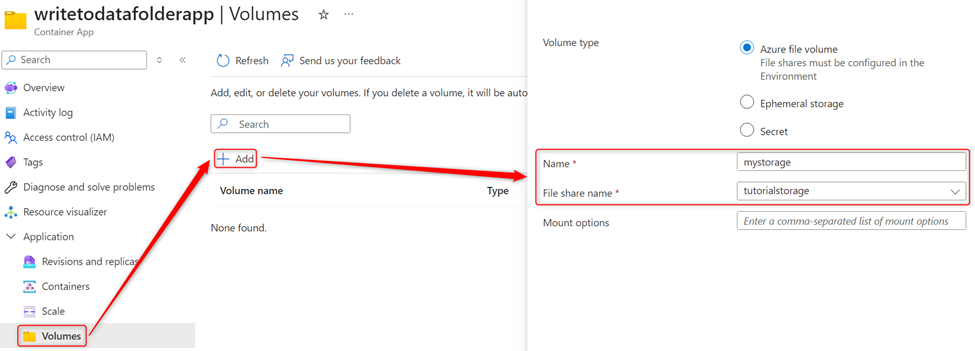
- Create a Volume
- Go to Volumes > Add.
- Select the file share you just added to the environment.
- Click Add and then Save as a new revision.
Step 4: Bind the File Share to Your Container
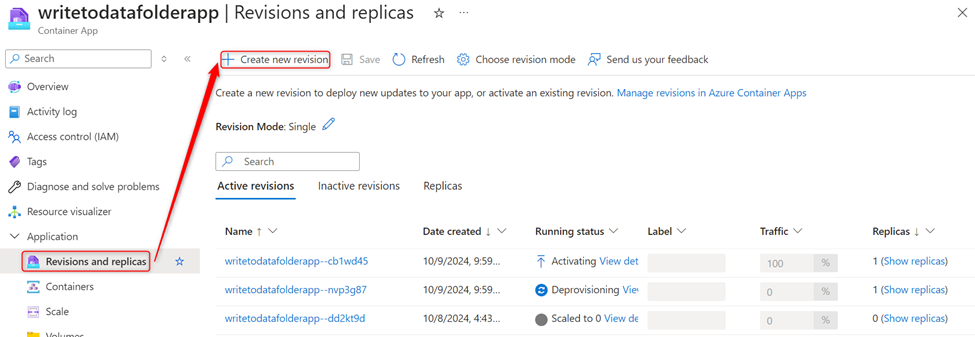
- Create a New Revision for the Container
- Navigate to Revisions and Replicas.
- Click Create a new revision.
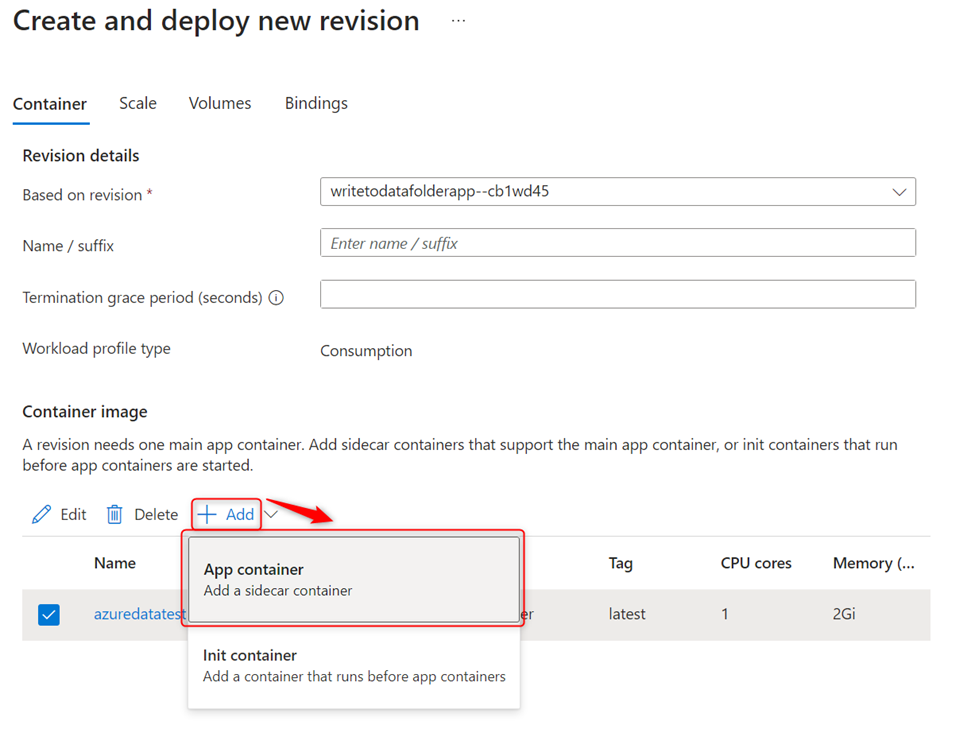
- Add a New App Container
- Configure the Docker image for your container.
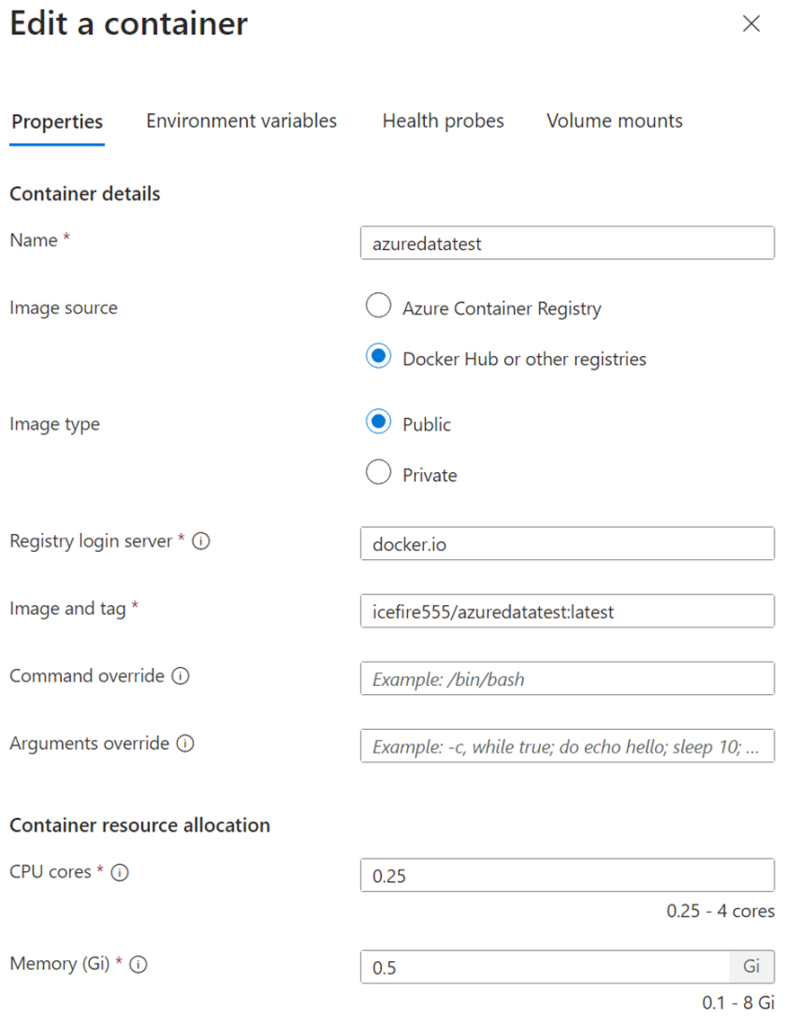
- Name: Choose a label for your container (this can be whatever you prefer).
- Image Source: Select Docker Hub.
- Image Type: Set this to Public.
- Login Server: Set this to
docker.io. - Image and Tag: For this tutorial, we’ll be using the image
icefire555/azuredatatest:latest, but you can use your own Docker image.
- Configure Volume Mounts
- Go to the Volume Mounts tab.
- Select the storage name from the volume you just added.
- Set a mount path. For this guide, we’ll use
/data.
- Save and Deploy
- Save the container and click Create to start the deployment.

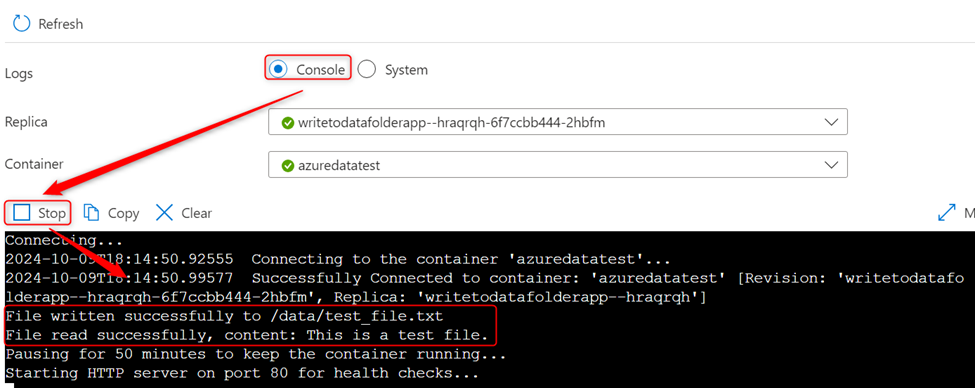
Step 5: Monitor Your Container’s Logs
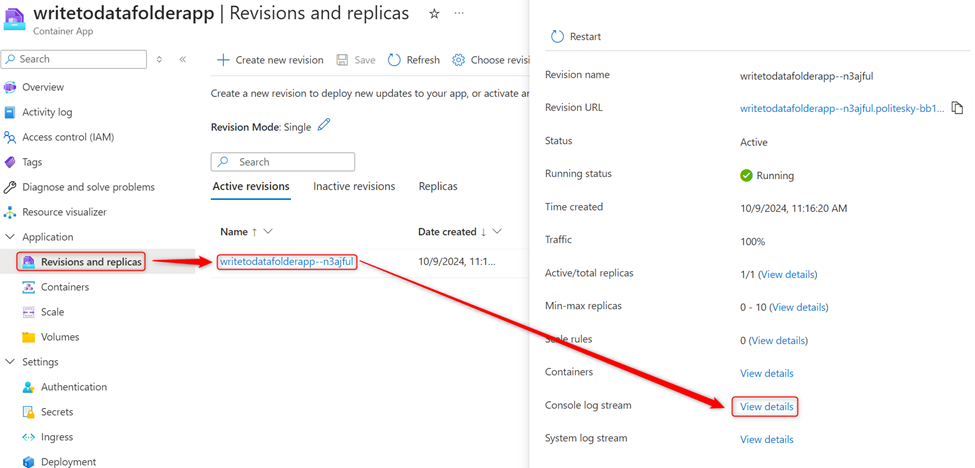
- View the Console Logs
- After deployment, select your revision and open the Console Logs to monitor the container’s performance.
- Storage Access
- If the container has already run, you can view the output file in the Storage Browser of your Azure storage account.


By following these steps, you should now have a fully configured Azure file share bound to your container app, ready for deployment and use. Feel free to modify these instructions to suit your specific application needs!