How to Add Custom Headers (Like Content-Security-Policy) in Azure App Service for WordPress NGINX Containers

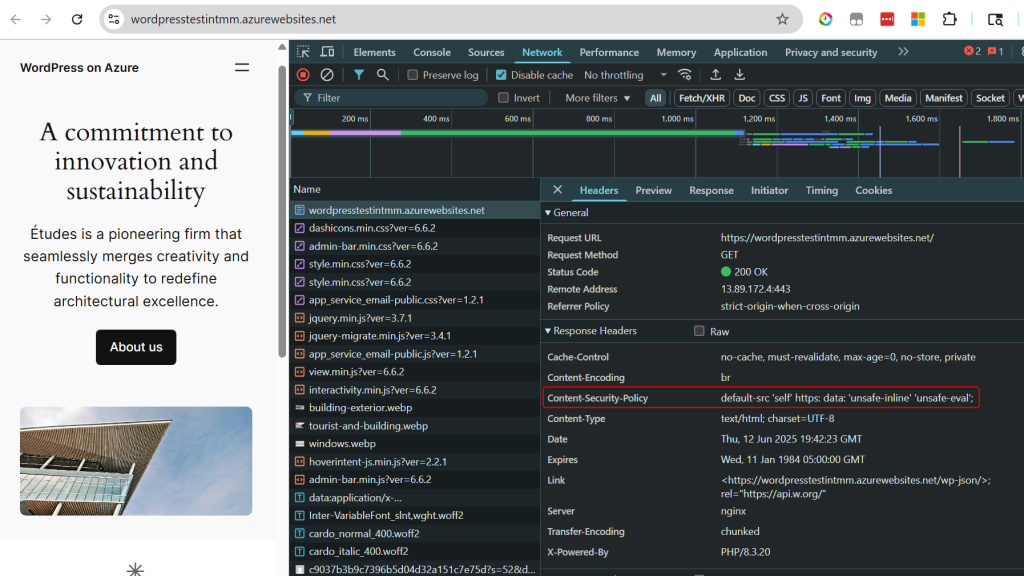
In this guide, I’ll walk you through how to add a custom HTTP header—specifically the Content-Security-Policy header—to a WordPress site running in an Azure App Service Web App for Containers on Linux.
We’ll use the following setup:
- Platform: Azure App Service (Linux-based)
- Container Image:
mcr.microsoft.com/appsvc/wordpress-debian-php:8.3 - Deployment Template: ARM Template for WordPress on Azure
⚠️ Disclaimer: Implement this at your own risk. This guide is based on my own environment and verified for my use case. Every deployment is unique, and changes like this should be thoroughly tested in your own environment before going into production.
Step 1: Access the App Container via SSH
- Navigate to Advanced Tools in your App Service panel.
- Click Go, then open SSH.
Step 2: Modify the Nginx Configuration
- Navigate to the Nginx configuration directory:
cd /etc/nginx/conf.d
- Open the default configuration file:
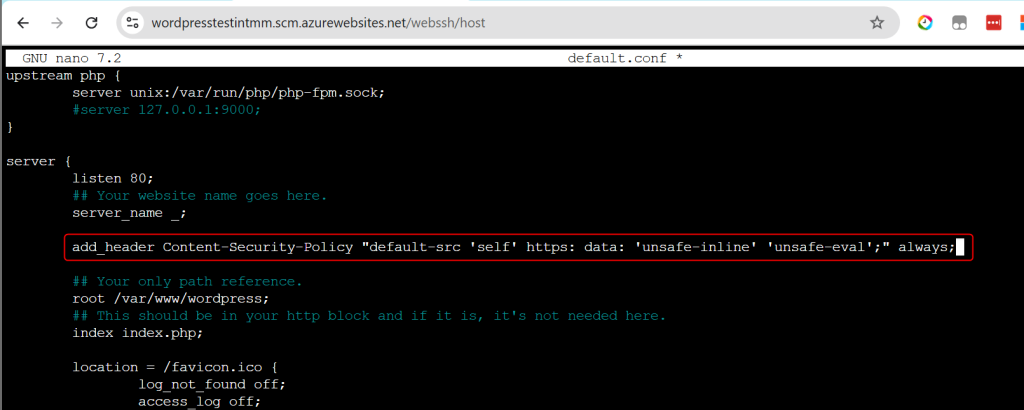
nano default.conf
- Add the following line anywhere inside a
serverblock:add_header Content-Security-Policy "default-src 'self' https: data: 'unsafe-inline' 'unsafe-eval';" always;💡 You can customize or add other headers here as needed.- (I’ve added an image below showing where I added it)
- Save the file:
- Press
Ctrl + X, thenY, thenEnter.
- Press
- Test the configuration:
nginx -t
- If the test passes, reload Nginx:
nginx -s reload
Your header should now be live!
⚠️ Caveats: Non-Persistent File System
The /etc directory in Azure App Service is non-persistent. Any changes made directly there will be lost on app restart or if scaling creates new instances. That means your headers could mysteriously disappear.
Let’s fix that by automating the change using a startup script.
Step 3: Persist the Configuration
- Back up the modified config file:
cp /etc/nginx/conf.d/default.conf /home/dev/
- Create a startup script:
cd /home/dev nano startup.sh
- Paste the following contents into the script:
 #!/bin/bash

echo "Copying custom default.conf over to /etc/nginx/conf.d/default.conf"

cp /home/dev/default.conf /etc/nginx/conf.d/default.conf
nginx -s reload
- Make the script executable:
chmod +x /home/dev/startup.sh
Step 4: Configure the App to Use the Startup Script
- In the Azure Portal, go to your App Service.
- Navigate to Configuration > General Settings.
- Under Startup Command, enter:
/home/dev/startup.sh
✅ You’re Done!
From now on, every time your container starts, it will:
- Restore your custom Nginx configuration
- Reload Nginx to apply the headers automatically
You’ve now got persistent, automated header injection for your WordPress container on Azure. 🎉